Over the weekend I decided to take on a new challenge. This one being my latest and greatest part design, at least I think it's my greatest. I've been doing a ton of studying and messing around with steering, but I'll keep those details for another post down the road as I've still got a lot to learn. Reason I even brought it up is because it has gone to show me just how incredible the Wisefab kit is. Simply put, it is the best angle kit on the market and I don't care if someone want's to argue that. The more I learn the more I see just how amazing that kit is and understand why certain things are the way they are on their setup. The one that I'm most interested in at the moment is their camber plates.
I remember when I first found out about their kit, the very fist thing I questioned was "why do they have those relocation brackets for the coilovers?". It was something I didn't understand and didn't even think much about it at first. Later on when more and more pics of cars at full lock started flooding my Facebook left and right I caught on to how flat their wheels were at lock. It was the one thing that really made the kit stand out to me. I have shots from different drift events where I see peoples wheels sitting at crazy camber settings at lock. Lead wheel will be showing a high amount of positive camber and the trailing will be at a very high amount of negative. The only way to try and fix this is to adjust your caster back, but you can only go so far with it. Then it hit me, the relocation brackets were to move your coilovers forward enough to avoid that and keep your tires flat! Also with having longer LCA it moves the camber adjustment out further than a normal camber plate would so your static camber isn't super negative like mine is currently. This is great for many reasons, the biggest reasons being more grip since your tires are flat and getting a good amount of contact, and eliminating tire flop. For those that don't know what tire flop is, it's when your tire goes from negative camber, to flat, to positive camber. This is something you want to avoid as it creates a sort of "dead spot" in your steering. That's about the most simplistic explanation I can come up with at the moment.
Recently I found out that other companies have caught onto this too, and are now making their own version of this. Of course here in America we have Formula Drift, and in the rule book it states we can't use relocation brackets... The way around this is to make new custom camber plates, ones that allow more adjustment. Of course there is a limit, FD rule book states it must remain within the circle of your camber plate mounting bolts to the shock tower. Parts Shop Max has began testing a design of theirs as well as GKtech who is still in the design phase. One issue I can see here is the Parts Shop Max ones will require you run their coilovers as they are designed to replace their camber plates. As for the GKtech ones they are looking to be universal per all coilovers, which is great, but since I don't really feel like waiting a century and a half on them, I've decided to take on the challenge of making my own which will be designed to work with Stance USA coilovers.
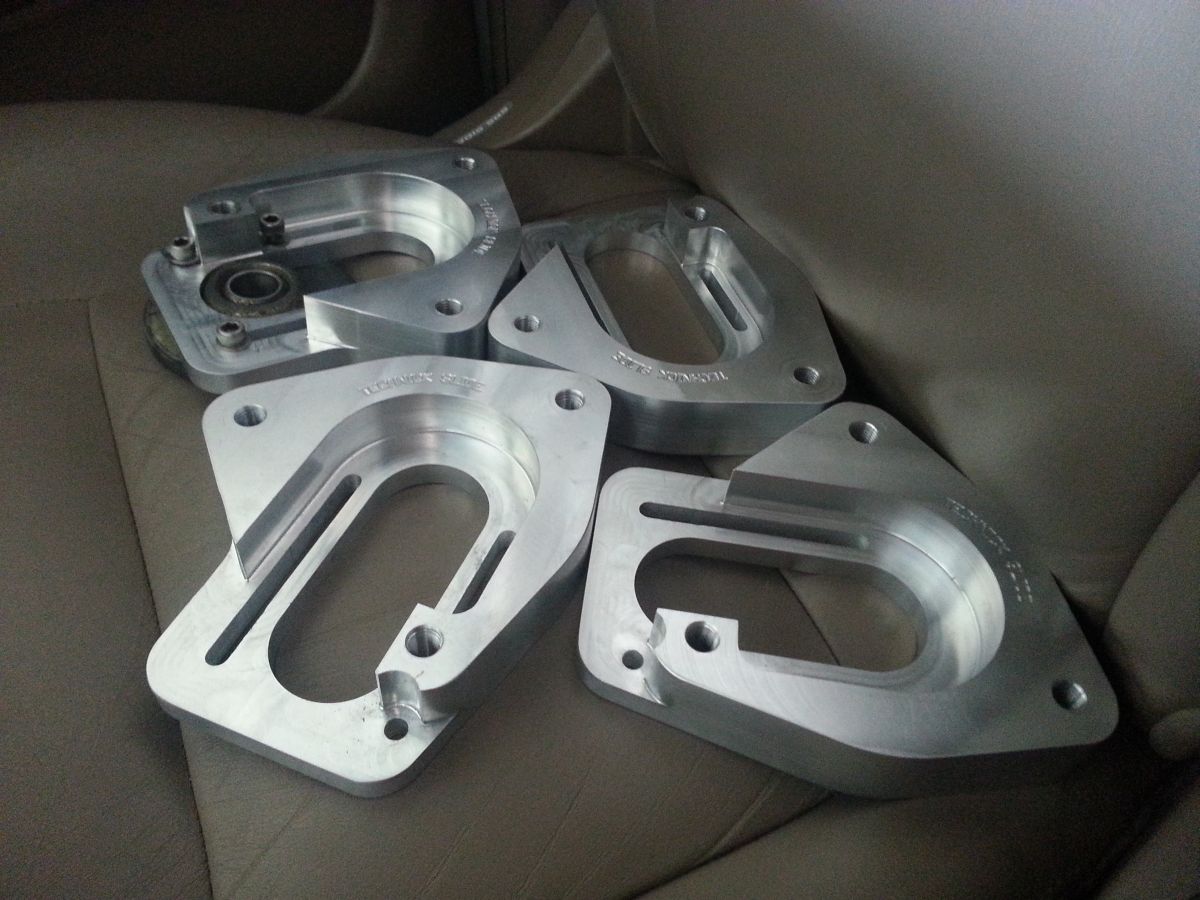
To help me with this I called up my best friend since I was a wee little boy, Keith Garland. He went on to pursue what I failed to do and became an engineer, so of course he's definitely a great friend to have around when designing parts. Thanks to him I learned some new tricks in Solidworks and we were able to get a design made rather quickly, and here's what we came up with.
One thing you'll probably notice right away is how much "taller" it is than a normal camber plate. This is because I want to avoid having to cut my shock tower. The plate adds just enough material to get the shock nut under the shock tower and have roughly 5mm of clearance, this way I'll still be able to adjust the car lower without the worry of maxing out the coilover adjustment.
I also decided it was time I began branding my parts so I added a nice little touch to it with a Technick Slide engravement.
For those of you who are curious about how much further these adjust the top of the coilover, here's a quick comparison of the difference these will make.
As you can see it's a pretty good amount and will hopefully be enough to keep those tires flat!
The drawings have been dropped off at the machine shop and now we wait...Once they are done testing will begin which will be followed by an update to how well they turn out!